Saturday, December 31, 2011

Presenting: The Wingwich

Greetings, 2012!


In 2011, M. moved across the street from a Wild Wing. It's a popular place for watching UFC and, from what I've observed, it's the Place 2 B for men who like to smoke out on the street and talk really loudly. This particular Wild Wing also projects the UFC match/fight/competition/show on the window for the rest of the world to see without actually going into the establishment. I've often watched and listened in on the Wild Wing happenings from M.'s window, mostly thinking about the mighty wing. I've dropped hints about making an excursion over there to chow down and share a basket to which M. replied "Hmm. I dunno, Jen."

One fine day, M. texted me with "I have an idea!!!" Always leave it to M. to take it up a notch and put a new spin on an old favourite.

THE WINGWICH
  • One dozen wings from your favourite wing joint. Our preference is the BBQ/medium wing
  • A bunch of organic celery and organic carrots
  • Some soft and slutty buns, preferably sub buns or long hot dog buns
  • Two servings of blue cheese dipping sauce provided by the wing joint
  • Makes 2-3 wingwiches


1. Using a vegetable peeler, shave some thinly sliced carrots and celery. Cut up the rest for some healthy snacking.

2. In a bowl, strip off all of the wing meat. Set the bones aside for sucking on later. Don't worry: you can still treat yourself to the savage and Fred Flintstone-like behaviour of sucking off the meat from a tasty little bone.

3. Slather on the blue cheese dressing onto to the soft and slutty buns.

4. Pile on the wing meat onto the buns.

5. Top them off with the shaved carrots and celery.

6. EAT AND ENJOY!!

Bunny Bling Bling Tip: It helps if you live across the street from a wing joint.

Saturday, October 1, 2011

Road Trip: The Oregon Coast


Bunny Bling Bling took the summer off of blogging and traveled distances for a bit of an escape from the day-to-day, insufferable humidity and city aggression. I ventured towards the beloved British Columbia, road tripped south towards Seattle, Washington, then headed east to Oregon. One major highlight of the trip was the 1 full day and 1 night along the Oregon Coast. I can describe the experience as majestic and wondrous.

We drove almost non-stop along the winding Highway 101, with only our final destination (Newport, Oregon) in mind. My eyes constantly moved across the landscape that engulfed our rented old-man black Cadillac to the point of dizziness. I was overwhelmed by the miles of healthy, monstrous walls of trees and endless beaches. The Pacific Ocean was like a dream. I don't have many opportunities to see the ocean, let alone the ocean crashing against high cliffs and rocks that bordered our big strip of a highway.


Tips for a long road trip:

  • Take a decent road map with you

  • Do a little bit of research and reading on a couple of key destinations, with places to eat and explore (We had Fodor's guide to the Pacific Northwest to help us decide where to stop)

  • Pack snacks and water (we had a variety pack of Voodoo Doughnuts from Portland, Oregon)

  • Have a full tank of gas (we almost ran out at one point. Not a good feeling when you're literally in the middle of nowhere)

  • Be prepared to listen to some local AM and FM radio (a lot of static and shuffling from station to station)

  • Eat some gravol (I don't know how I'd survive a long car ride without it)


View from the Astoria Column, in Astoria.


Haystack Rock in Cannon Beach


Amazing clam chowder and fish and chips at the Old Oregon Smokehouse in Rockaway Beach


Foggy morning. A lovely stay at The Whaler Hotel in Newport.


Checking out some marine life in Newport, with the sounds of sea lions arfing it up in the distance.


Sadly, 1 day and 1 night was clearly not enough time to really take it all in as we left with just wanting more. We would love to go back and do it again, with more time spent on the beaches and going even further down south, driving all the way to California. Next time!

Up Next: M.'s post about cats in Switzerland!

Tuesday, May 24, 2011

Backyard BBQ Dinner


What can I say? I love warm weather, lazy days off and, most of all, BBQ.


What's a BBQ without roasted red peppers and asparagus? Huh?!


Rice vermicelli noodle salad with green pepper, sugar snaps, chopped mangoes, scallions (sauteed with sesame oil, sugar cane vinegar, honey and ginger) and blackened tuna. Dressing: lime cilantro vinaigrette


These incredible sandwich creations contained the BBQ'd chicken souvlaki, covered in a homemade Tzatziki sauce and a Greek Salad. The buns came from Brazil Bakery (1554 Dundas Street West, Toronto). They were so good. I had one whole one to myself!!

The Caesar Salad had homemade croutons that were tossed in bacon fat (what what!). It also had slivers of wild leeks that M. and her partner had picked earlier in the week on a secret journey of leek picking somewhere outside of Toronto. Picking wild leeks involves some insider information.


Bunny Bling Bling Tip: Always celebrate a special occasion with fireworks.

Tuesday, May 3, 2011

Interview: David Han

Name: David Han
Age: 33
Location: Toronto
Craft: Smart ass/Imagineer/Media artist/Basketball enthusiast

How would you describe your craft to people who aren't familiar with what you do?
I usually tell them that I make the kind of film or video installations you might see in an art gallery or at an event like Nuit Blanche.

Where do you primarily draw your ideas and inspiration from? What is your creative process like?
I guess a lot of work I'm interested in really goes back to Gene Youngblood's concept of expanded cinema. Although I come from a film and television background, I really like this idea of the films being drawn out of the cinema, leaking out of the darkened interiors of movie theatres and into real life, real places. Contemporary technology has really pushed this process along, making this an everyday experience.

As a result, it's usually the technology that's the starting point for my creative process. I'm interested in the promise surrounding a new piece of technology. Promise, not in a utopian sense, or in some fetishistic, fan-boy sense, but more like the sense of wonder or magic that surrounds new technology. A lot of my work tries to evoke this sense of wonder through the integration of such technology, often in unsuspecting and curious ways.


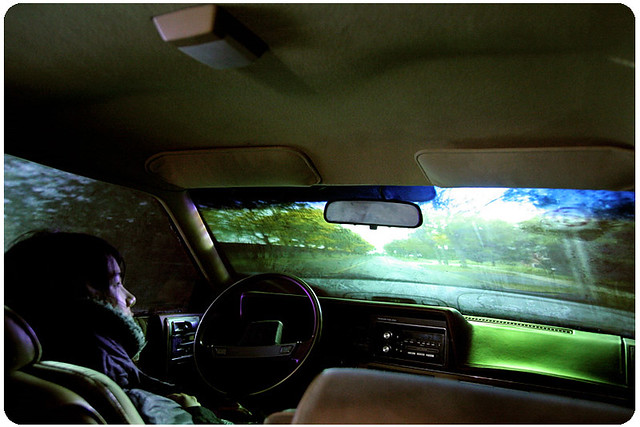
"Margaret Learns to Drive From There to Here"
multi-channel video installation exhibited at the MOCCA, 2010 and The Leona Drive Project, 2009.

What kind of materials do you love working with and how are they related to your ideas?
I love trying to find a balance between the familiar and the strange. In a lot of my work, there's an attempt to take something very mundane, or familiar - like a mirror, a car, a treadmill, or, in the case of my most recent work, your own shadow - and then subvert or alter the relationship with that object or phenomenon, usually through the integration of contemporary technologies like custom software. I suppose this goes back to my interest in the sense of wonder or magic that often accompanies new technologies.

I'm reminded of the story of the Lumière Brothers film "Train Pulling into a Station", one of the first films ever screened for the public. As the story goes, during the scene in which the train comes towards the camera, the audience in the theatre screamed and ran away from the screen. I like that story.
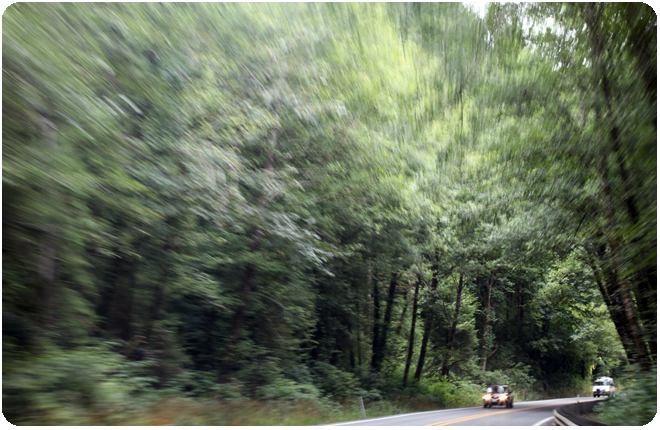
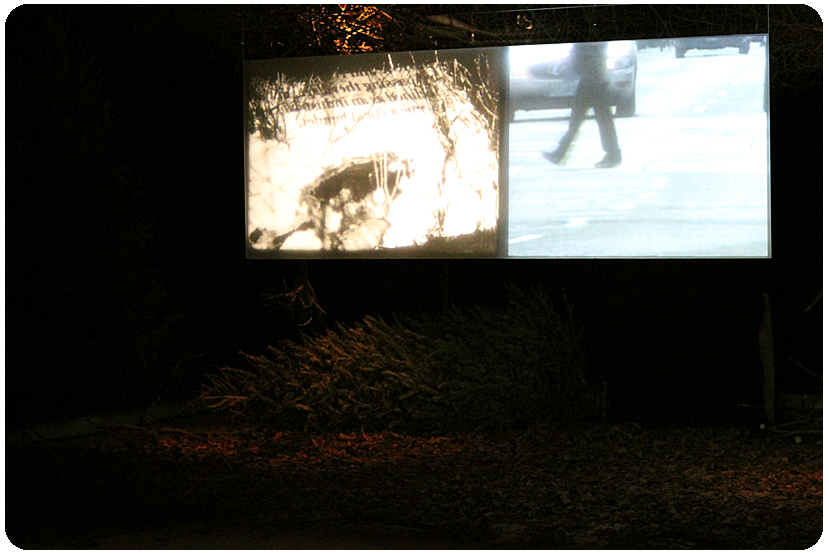

"Restive Threshold"
Film and Video Installation, exhibited at the Eleanor Winters Art Gallery, 2011.

What interests you the most about Toronto these days?
Recently, there's been an increased interest in 'maker', or DIY culture. While InterAccess Electronic Media Arts Centre has been fostering a small, but dedicated, artist-centric maker community for the past 30 years, I've recently discovered a few other organizations that really speak to the diversity and vibrancy of this culture. Places like Site 3 coLaboratory and DDiMIT are popping up all over this city, which hopefully points to a future where Toronto becomes an epicenter for this type of work. If you're interested in seeing for yourself what I mean by 'maker' culture, check out Toronto's first Mini Maker Faire on May 7-8, 2011 at the Evergreen Brick Works.

You've lived in and around the Bloorcourt Village neighbourhood for quite some time now. What about the neighbourhood has made you stay put there for so long?
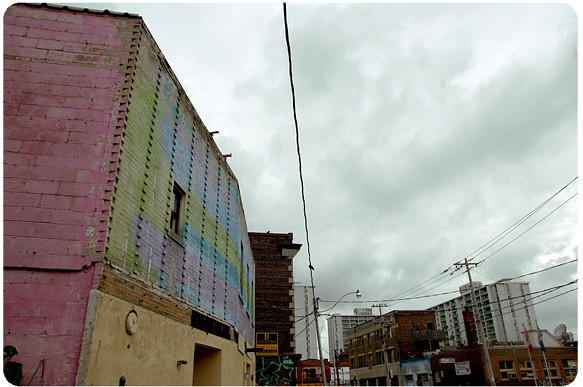
I've lived there for almost 8 years now. I like the fact that while it has seen its share of changes, it still has a real community feel to it. The pace of gentrification in Bloorcourt/Bloordale is slow and languorous, almost as if it's not really happening, or as if the developers aren't really sure that this neighbourhood is worthy of gentrification. It means that there's enough time for a community to be born, time for adjustment and understanding (instead of resentment) and the formation of unlikely allegiances between community members of disparate backgrounds. If you've ever played soccer with hipsters, humanists, Brazilian teenagers and Eritrean cab drivers, you'll know what I mean.

You have two cats named Sebastian and Eddie. Tell us a funny story about them.
Ah. My cats. They are like a 80s cop movie. You know, the kind of 80s cop movie that features a grizzled old veteran, a few weeks from retirement, who gets partnered with a young, rambunctious rookie whose all bravado and nonsense. Exactly like that. All the time.

Bunny Bling Bling Tip:
David is participating in the Sight & Sound: Audio & Visual New Media Festival
from May 11 - 17, 2011 in Montreal, Canada! Go check it out if you're in and around the area.

http://www.davidhan.ca/

Saturday, April 16, 2011

beautiful eggs, happy spring


M. recently picked up a batch of these beautiful eggs from a friendly farmer. Check out the glorious colours and patterns on these eggs!


We then decorated a few of these eggs using scraps of silk from old ties that we found at a neighbouring thrift store. The process was simply wrapping the eggs with pieces of silk used from the tie (the silk pattern facing the egg), then wrapping them again with scraps of white cloth. We used string to secure everything into tight little pouches. We placed the eggs in a pot of water, covering them completely, and bringing the water to a boil and then simmering them for approximately 20 minutes. Unwrapping them and seeing the surprise underneath was just like Christmas!

M. told me about another method of dyeing eggs using onion skins. This method seems to be popular among European grandmas.

Try making these Silk-Tie Easter Eggs for your special bunny this Easter.

Wednesday, April 13, 2011

April showers brings may flowers and a summer full of satisfaction!

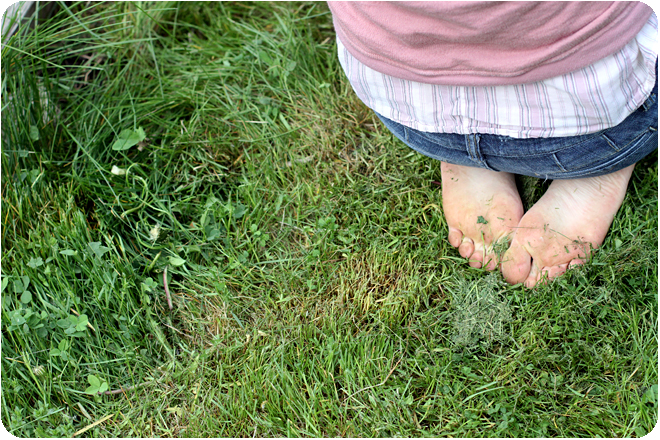
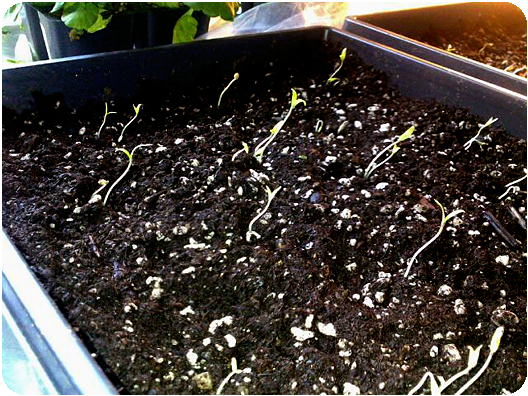
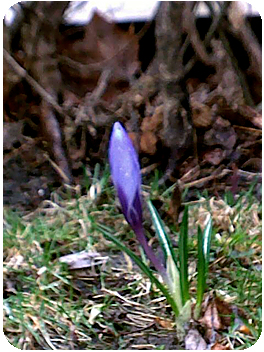
Even though it's raining outside, and everything looks like a hundred different shades of brown and grey, I know for sure that spring is coming for a couple of reasons: it has warmed up, I can wear my Converse again, and there is this one single flower that popped up on the lawn.

Hello, flower!

I started growing some seeds indoors. What a feeling! I got my seeds from a small but fantastic store in Parkdale called Urban Harvest. This is a wonderful little organic place where you can get all your seeds and gardening needs, as well as organic spices, oils, and beauty products made by local people who don't do sketchy stuff.

At work, we get these trays filled with live seedlings that we harvest and then use as a garnish on our food plates. Once they are done, the guys just toss the containers out! I know! I saved a few because they are perfect for seedlings. We get 2 sizes: large and half size. If anyone wants free trays for growing seedlings, just let me know. I'm dying to pull more out of the recycling! Reduce, Re-use, Recycle, folks! There is no excuse. You can grow seedlings in just about anything that has good drainage.


The workshops held at the Stop Community Food Centre's Green Barn teach kids to start their seeds in anything from yogurt containers to milk cartons. I found their little collection very inspiring.

Hey, good job kids!


I started some beefsteak and cherry tomatoes, lemon cucumber, Armenian cucumber, patty pan squash...


And for the cats, some cat grass!

So, just after 4 days, all the seeds have sprouted and I'm so excited for spring. I'm wondering if this year we can use the garden at its fullest potential? Maybe we won't even need to buy any produce and live off the land like the folks did back in the day? That will be my goal this summer. If I happen to buy an onion, or something I'll report back to you!


Up next:
planting seeds outside!

Sunday, April 3, 2011

DIY: Rewire a Lamp


Rewiring a lamp: not so difficult.

For the past few months, I have been on the hunt for the perfect table-top lamp that suited my tastes and overall needs of light. Lamps are important. They accent and beautify a room, set a mood and tone, maybe make things romantic or mysterious. And I didn't want to spend too much money on something ugly and generic, or something that took up too much space.

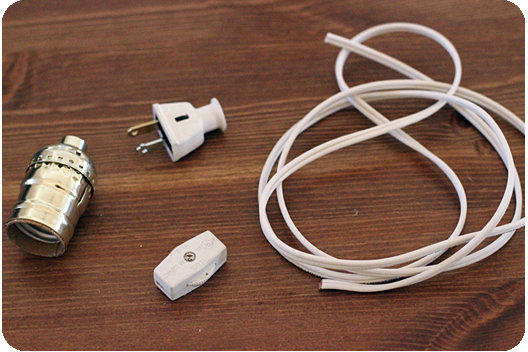
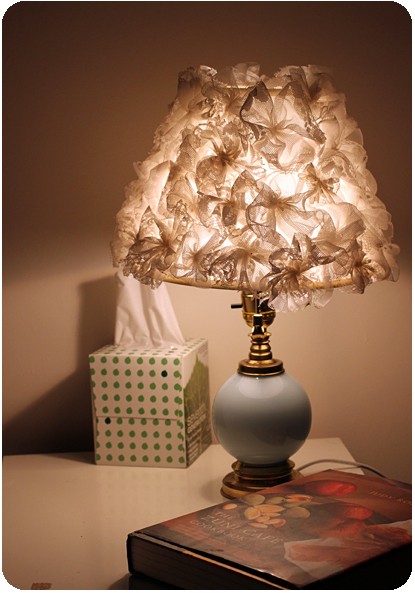
M. suggested that I rewire an old or used lamp, one that I could possibly find in a junk shop or in the dumpster. Really, it's all about taking the insides out of the base and replacing them with a new and fresh wire and socket. She had done it herself (see: right), having bought a make-a-lamp kit from Canadian Tire and assured me "If I can do it, YOU can do it."

I found quite the beaut of a lamp at Value Village for 7 bucks. It is ideal in size and has that old timey-grandma style that I love. I visited Jacobs Hardware (410 Queen Street West) and told them "I am rewiring a lamp. Give me what I need. What do I do?"


Supplies:

- Lamp cord
- Keyless Lampholder (660W - 250V)
- 2 prong plug (a lamp kit will have the plug already attached to the cord)
- In-line Switch (optional)


Tools that will help you:

- a flat head screwdriver
- electrical tape
- sharp scissors or an exacto knife
- pliers (optional)
- confidence and patience

The guy was so nice and gave me the run down of how to connect the cord to all of the pieces. I had forgotten everything he had said as soon as I left the store. I also threw out all the packaging that contained all of the instructions.

The great thing about the internet is that it has all the answers.

Video Tutorial: How to Rewire a Lamp


Links:
How to Install an In-Line Switch on a Lamp Cord
Another tutorial with nice diagrams

Bunny Bling Bling Tip: Make sure that there are no stray wires hanging from under the socket's screws. Take your time with doing this precisely and properly because YOU DON'T WANT TO START A FIRE.